Thursday, September 27, 2012

The products.

For the more refined pewter pieces, I pre-pierced the general shape of the pendants before fly pressing. 
I am drawn towards the finished pewter pieces with the broken but distinct borders which just frame the words so nicely. The little nuances in the contour of the piece give it this authentic kind of feeling. 
For this piece I used a visually strong silver, oval jump ring on a piece of tea-stained lace.
I chose this lace in particular because it is made of thick strong material with texture to it. It does not feel like the new, flat materials often used now days.
It also added a touch of the feminine to an otherwise quite masculine pendant.

 For the piece below I letter punched sugar&spice on one side and all words which one associates with "all things nice" on the other side. Only the border was fly pressed.
 I put this piece on some old cotton fabric which I stained and stripped and knotted.

 With some of the metal components of the Sugar and Spice sandwich I made labels for ornamental bottles of "sugar," "spice" and "all things nice"

Cast and pressed

Below are the cast bronze stamps. 

 My first attempts were using a wax impression of ceramic words which were then cast into bronze.

 The Rhino cut bronze blocks produced much clearer letters. I made the pewter pieces by fly pressing a sandwich of bronze-copper-pewter-copper-bronze.

 This resulted in a double sided pewter piece and two pressed copper pieces.
I tried out some letter punching to use in combination with the pressed words. I managed to get a hold of some typewriter font punches as opposed to the sans-serif fonts.

Tuesday, September 25, 2012

Sugar and Spice: a new recipe

I made some wax "sugar" and "spice" blocks by designing and cutting with Rhino CAD. These were cast into bronze to be used as stamps for pressing pewter and copper. I made a few variations with some writing in relief, some recessed, some forwards and some backwards such that the copper pressed with them can be used as the front or back depending on the stamp. I tried to incorporate some variations of borders so that the pressed product would be delicately framed. 


Monday, August 27, 2012

Tea staining

I did some of my own paper tea staining. I used water colour paper.
 I used wet and slightly wrung out tea bags as stamps ...
and left some to soak right in...
 I used a white candle as a resist to make a subtle border and then dipped an entire page in tea.
 I realised if left to its own devices the tea seems to dry quite evenly and so put plastic on after dipping this sheet to draw the tea thicker where there is contact with the plastic.


 I wanted to stain this small piece of wallpaper and so tried to use it as a stencil at the same time.
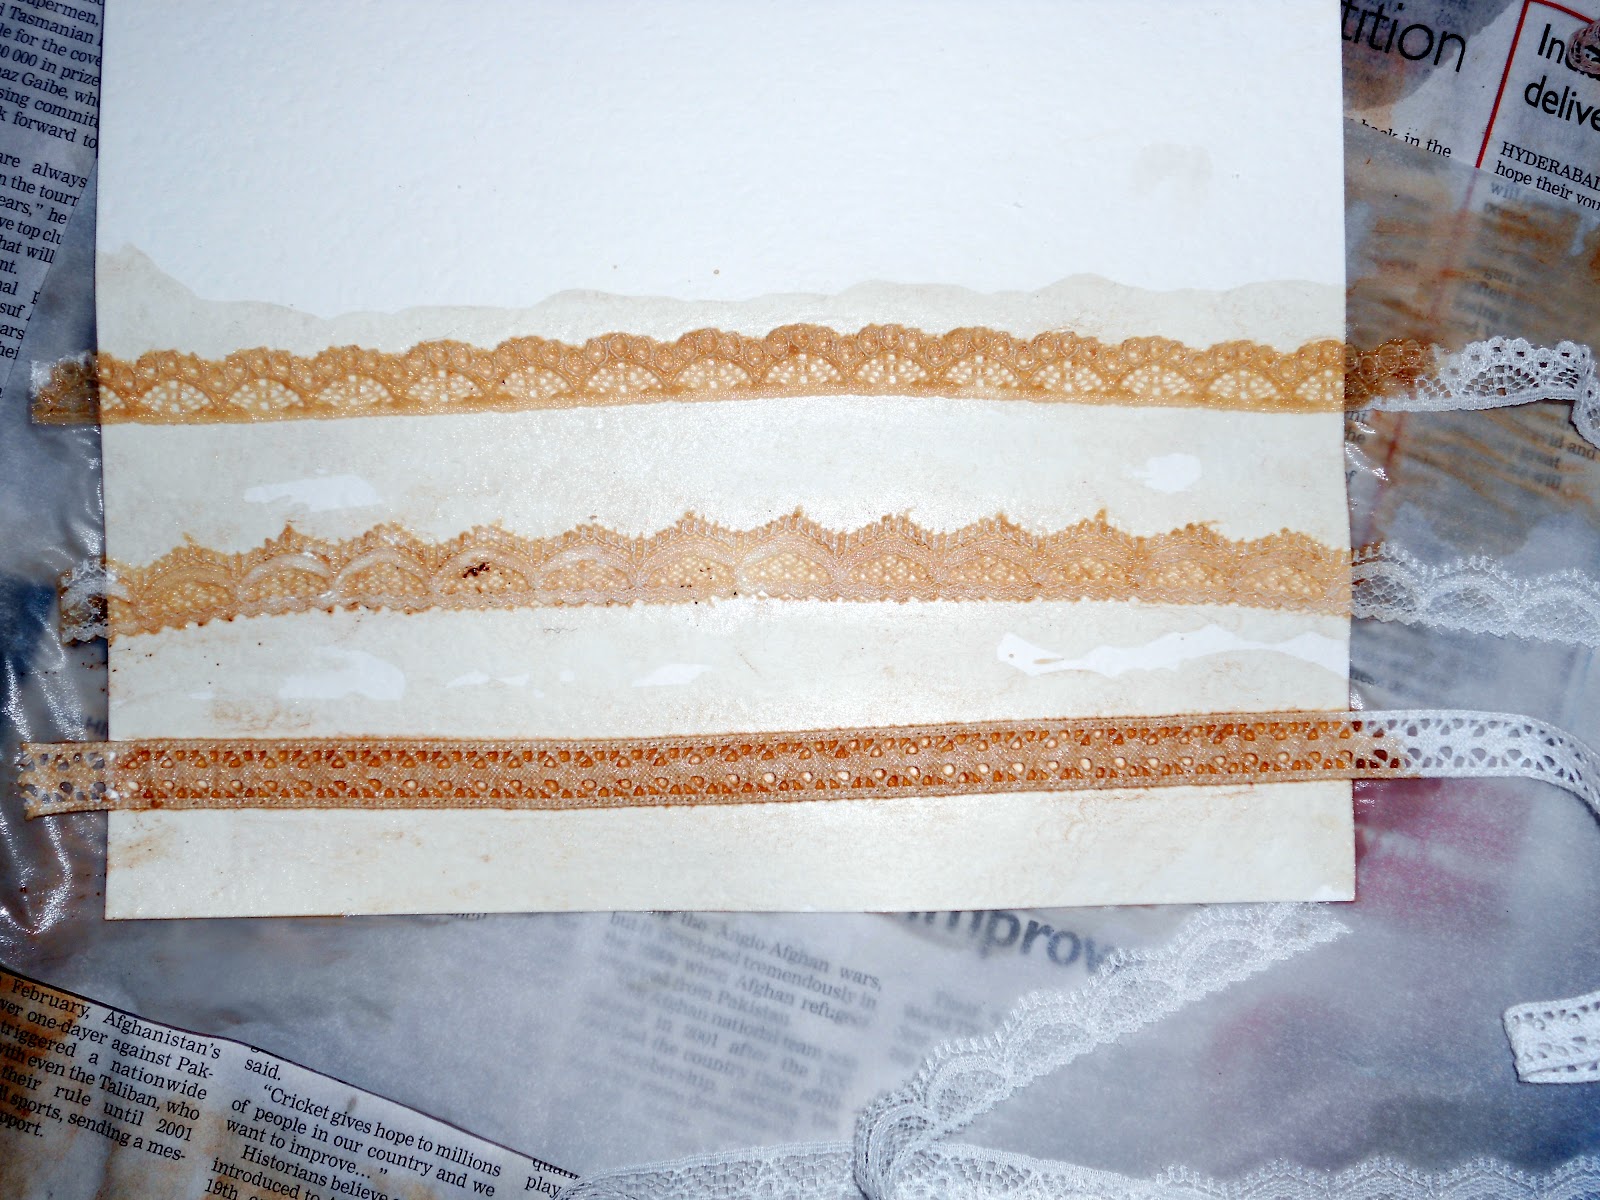
 I also stained some white lace I had bought and used it as a sort of stencil too.

 Here is a before and after effect of some white and some tea stained lace.

 I used a cut out of mary and her lamb to put candle wax down as a resist and stain around it. The subtlety of the white and brown feels aged.
 Slightly more challenging was my attempt at stretching a stained piece of paper around an embroidery frame...it gets worn and a bit torn but I am trying to decide whether or not that is in fact more desirable in my context of making an old-looking nostalgic-feeling object.
 The feeling of an old fashioned frame with aged content goes nicely with my nursery rhyme theme, i think. It allows for illustration format.


Artea


Tea stain just has the right look, even before connotations of beautifully crafted old tea pots and lacey gloves begin to surface. It is the colour and fade of age. Old books, old clothes, old buildings...